Installing your server’s operating system is an important part of making your own homelab or business server. In this guide, I will go over the full installation process for my personal server operating system of choice, Ubuntu Server.
What you need
- 8gb USB
- Pc/Laptop
You need a pc/laptop running windows, and an 8gb USB that you are willing to wipe. You will need to download a .iso file onto your pc and you will need a program capable of burning that file to the USB.
Downloading the OS
You will need to download the Unbuntu Server .iso file. You can download it directly from Ubuntu’s website. You should see a page that looks like this or something similar to it:
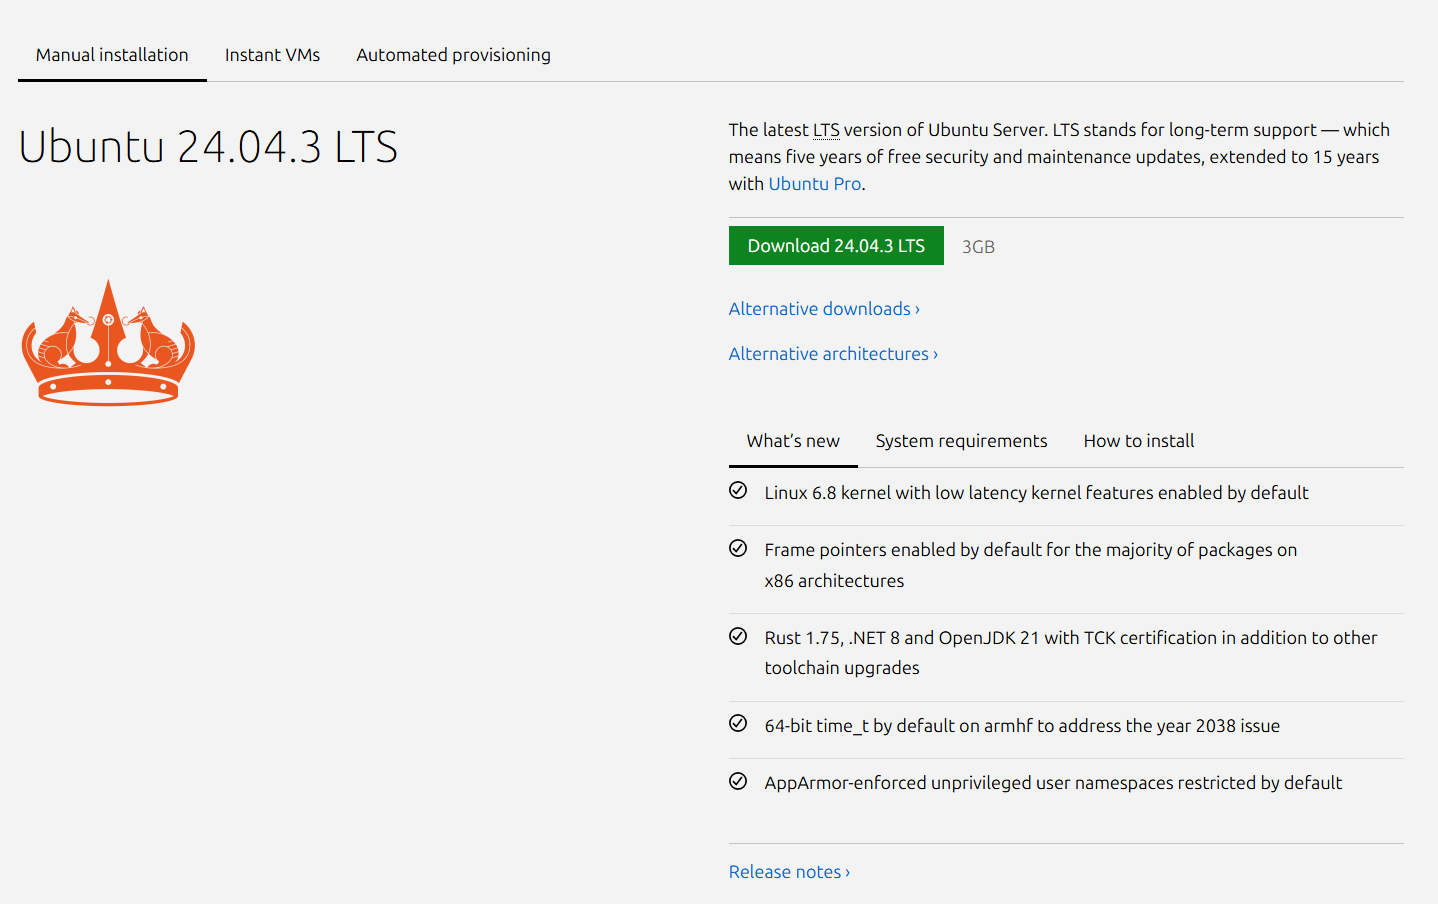
Click The download button. It will redirect you to another page, and the download will begin automatically.
Once downloaded, the file should look like this or something similar to it:
- ubuntu-24.04.3-live-server-amd64.iso
Be sure to check that the file type is .iso / ISO File and not any other type of file as you will not be able to burn any other file type to the USB.
Burning disk image to USB
There are a couple different options for burning your .iso file to USB in terms of software. here are a few common ones that work on windows.
The GUI’s for each of these may be different but, choose the one that works the best for you. For the purposes of this tutorial I will be using Etcher. Feel free to use other programs, just follow along with the general instructions.
Once you have downloaded Etcher, open the executable file. It should look something like this:
- balenaEtcher-2.1.4.Setup.exe
You will be greeted with a screen that looks like this or something similar to it:
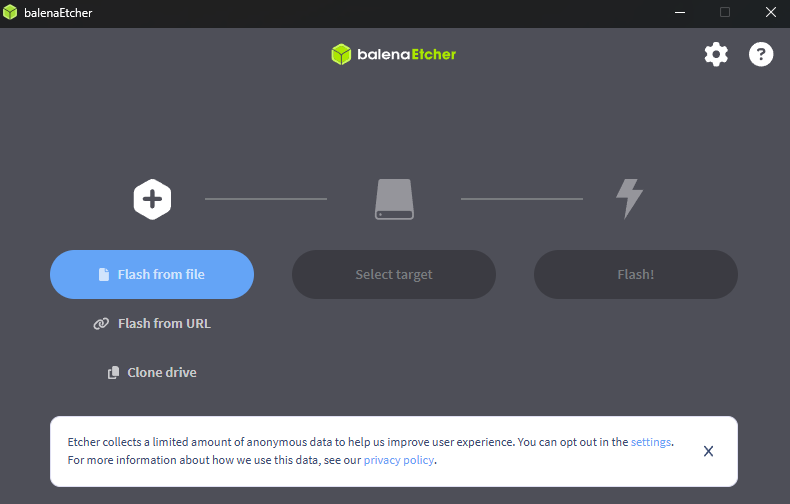
Click the “Flash from file” button. Etcher will open file explorer. navigate to your Ubuntu Server .iso file. Select it and click open.
The GUI will update to a screen that looks like this or something similar to it:
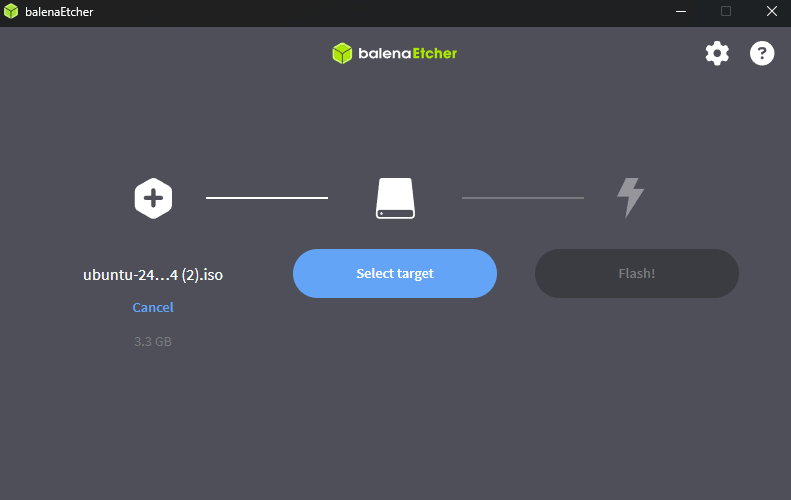
Click the “Select target” button. Etcher will open a menu with all of your attached storage devices. Select your 8gb USB device.
IMPORTANT: The storage device you select here will be completely WIPED. All of its data will be erased, so be absolutely, 100% sure that you have selected the right storage device.
Click the highlighted “Flash” button and it will begin the burning process. Once it has completed, you can close the program and remove your USB device. Optionally you can delete the Etcher .exe file and Unbuntu Server .iso file from your computer if you do not intend to burn any more .iso files to USBs.
Booting from the USB
WARNING: Only complete the following steps after you have burned your .iso file to the USB.
This part is not so straight forward and may vary from system to system depending on your PC’s BIOS but the basic steps will remain the same.
Power off and Plug your USB device into the PC that you intend to install Ubuntu Server on. Once the PC is fully shut down, power it back on and repeatedly press the key that you typically use to enter your motherboard’s BIOS. These keys are usually one or more of the following:
- Del
- F12
- F10
- F2
- Esc
Once you are in your motherboard’s BIOS, navigate to the Boot Menu either with your mouse or arrow keys. Not all BIOSs use the same names for the Boot Menu but here are some common ones:
- Boot Menu
- Boot Options
- Startup Menu
- One-Time Boot Menu
Once inside the Boot Menu, navigate to Boot Device Priority / Boot Order and select the first bootable device to be your USB device. In some systems, you may need to go to Advanced Options to be able to select a USB as a bootable device. Once you have changed the Boot Order to include your USB device as the first option, save and exit your BIOS.
Once you have saved and exited, your computer should automatically restart and boot from the USB, If your computer does not restart automatically, power it on. If your computer refuses to boot from the USB, go back to your Boot Order list and remove the drive containing Windows or other conflicting operating systems from it.
Installing Ubuntu Server
After your computer has restarted and booted from the USB, you will be greeted with this screen:
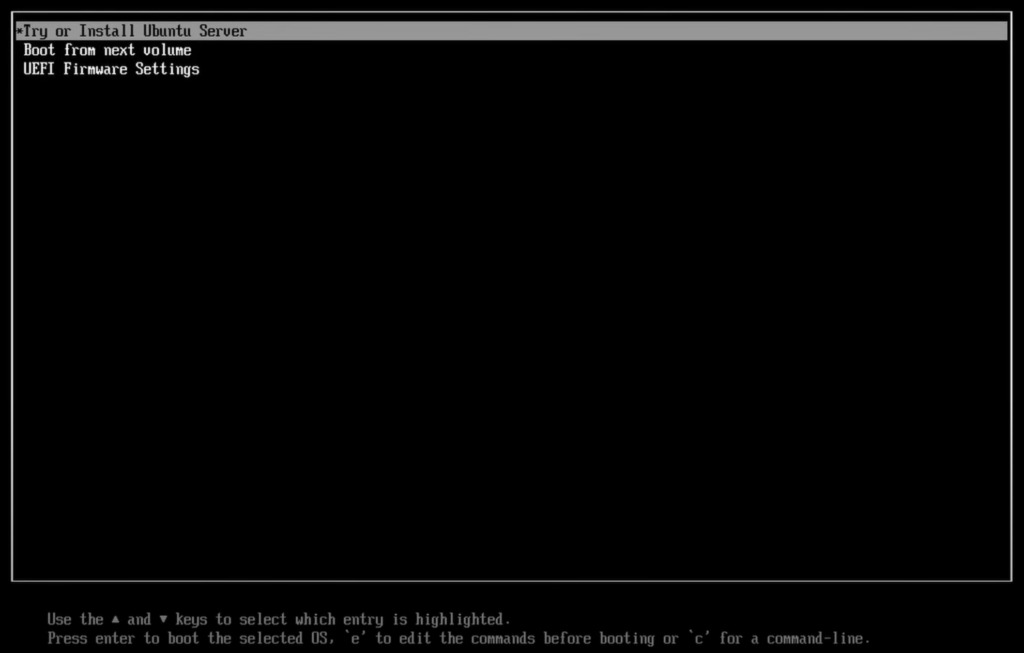
Use your arrow keys to select “Try or Install Ubuntu Server” and press Enter this will start the setup process.
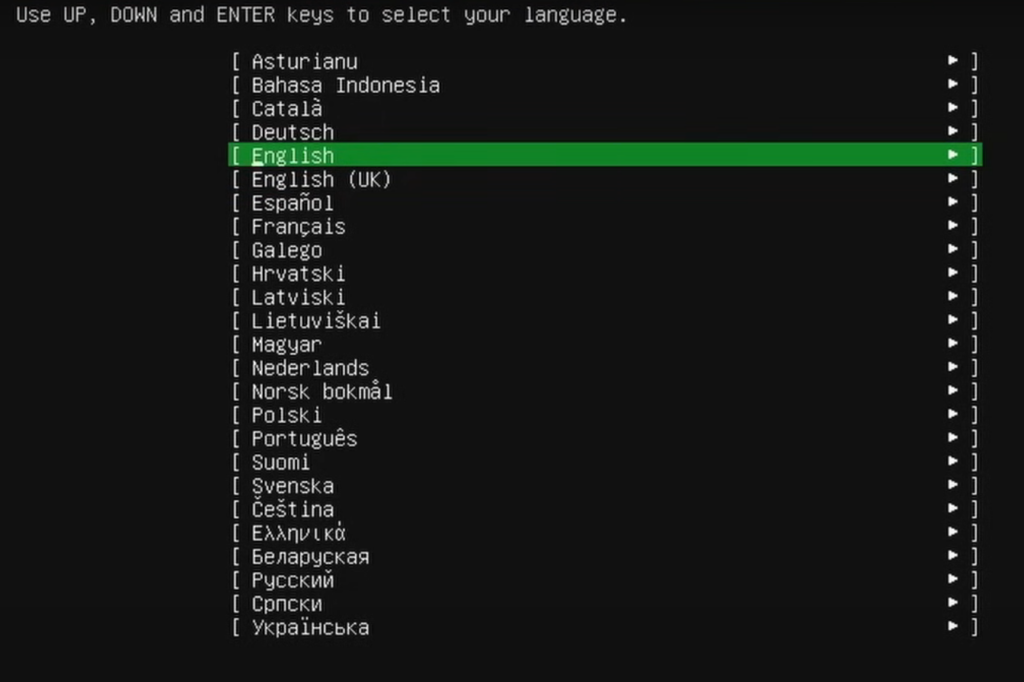
Select your preferred language and press Enter.
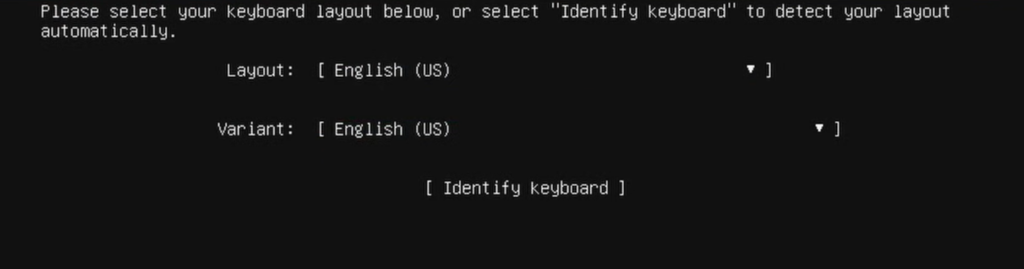
Ensure that your keyboard layout and variant match your current keyboard. Select “Done” and press Enter. On the next screen you will see this:
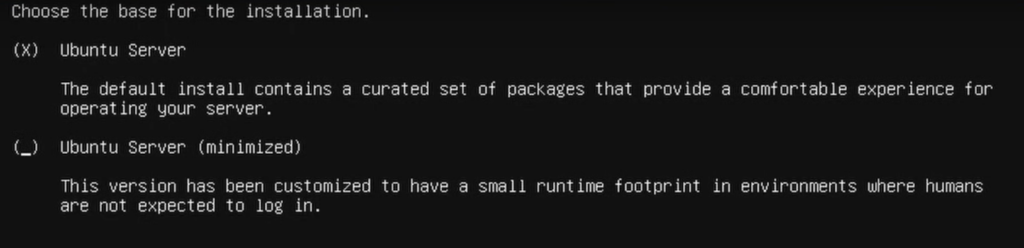
Unbuntu Server will be automatically selected by default, Unless you know what you are doing and know how to use and operate Unbuntu Server (minimized) do not change the default selection. select “Done” and press Enter. you will be greeted with the “Network Connections” screen:

If you are connected via ethernet you will see the Type “eth” and if you need to connect to WIFI, you will need to configure that here by selecting and pressing enter on your WIFI device -> scanning. select your network and connect to your network using your WIFI password.
WARNING: If you do not set up any form of network connections on this page, it will be very difficult to do so once you have installed the operating system as your installation will not have the necessary software to connect to WIFI networks or scan for them. Ethernet connections are still possible but need to be configured manually.
Once you are connected to a network, select “Done” and press Enter. You will be greeted by the proxy setup page. If you do not need to configure a proxy, select “Done” and press Enter. If you do need to configure a proxy, navigate to the text field and enter your proxy:

The next page is “Configure Ubuntu Archive Mirror” and it can be skipped as it will be filled out automatically (Its default should be fine for most users). So select “Done” and press Enter. On the next page you will see:

Under “Use an entire disk” you will see your systems storage device that has been automatically selected to host the operating system. Be careful to select the correct drive as whichever drive you select will be COMPLETELTY ERASED. So If this drive contained a windows operating system before, or any important data on it, after installation it will be completely erased and overwritten by the Ubuntu Server OS.
Once you are done, select “Done” and press Enter. On the next screen you will see:
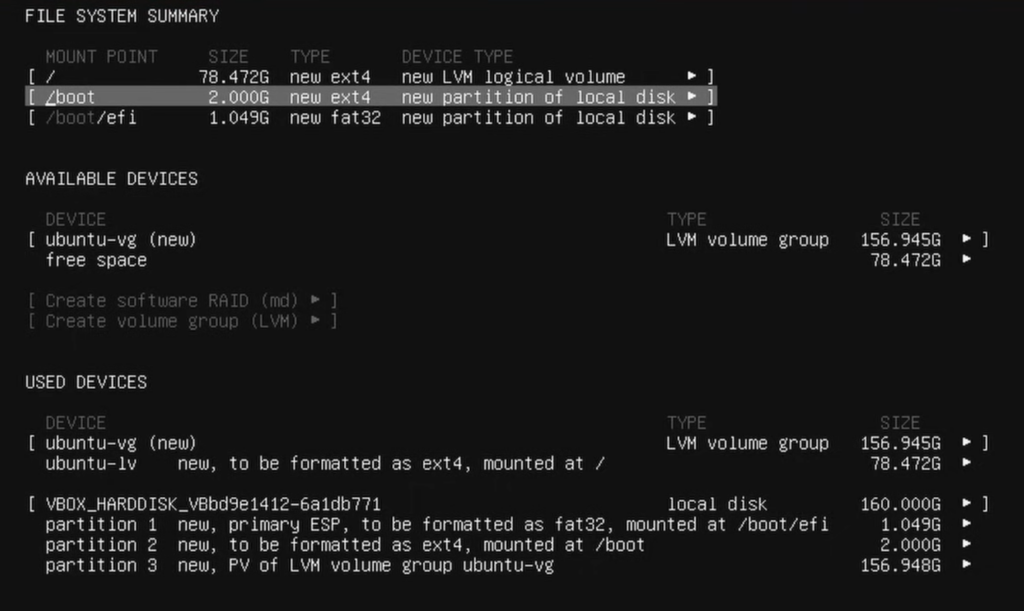
Typically the default values for this are okay, but if you want to do any configuring, select the individual device and press enter to manually assign size values. Once done, select “Done” and press Enter. A popup will appear that looks like this:
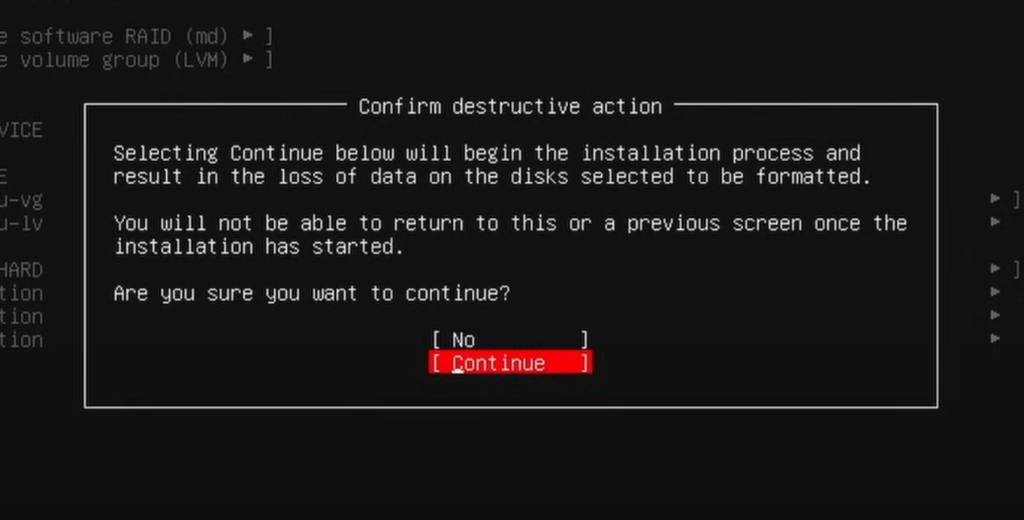
This is yet another warning that the drive you have selected to install the operating system on will be formatted and all of the previous information on it will be completely and permanently erased. select “Continue” and press Enter if you are absolutely sure you have selected the correct drives and are okay with them being erased.
WARNING: Once you press Enter, there is no going back. past this point the data on the selected drives will no longer be recoverable.
On the next screen, fill out the following fields and remember what you put here as this will be the only way for you to access the operating system once you are done.
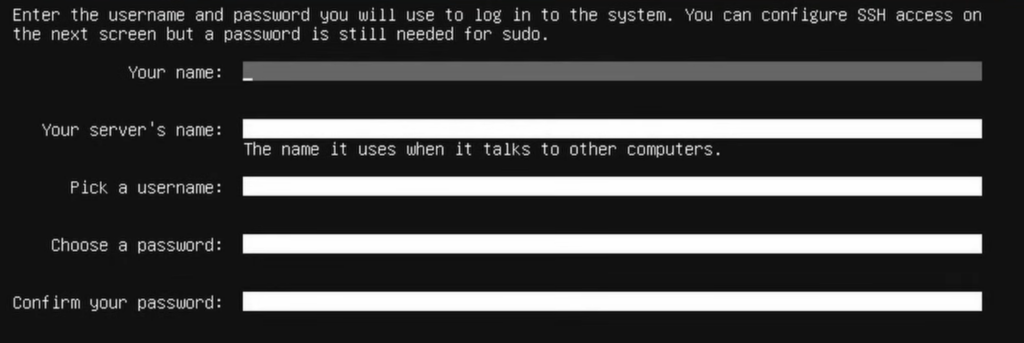
Once you have filled out all of the required fields, select “Done” and press Enter. you will see this:
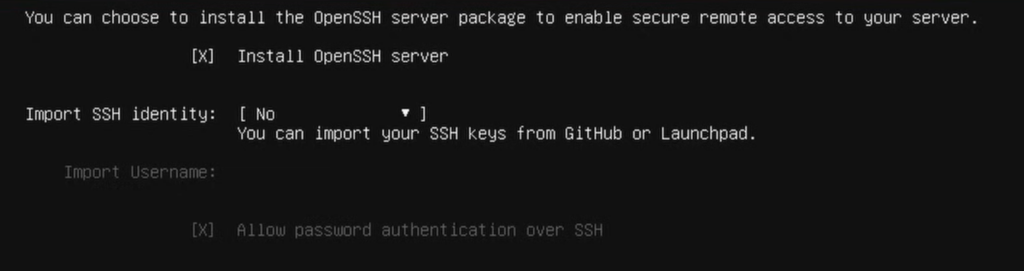
If you would like to be able to remotely access your computer via another computer with SSH or via Cockpit (Once it is installed), Check “Install OpenSSH server”. If you would not like to be able to remotely access your server, uncheck “Install OpenSSH server”. Once finished, select “Done” and press Enter. Next you will be greeted by a “Featured server snaps” page, if you would like to install any of the packages, check them, select “Done”, and press Enter.
you will be greeted with a snapshot of the installation terminal. let it do its thing, it will take a few minutes. Once you are prompted with “Reboot Now”, select it and press Enter. then remove the installation media (your bootable USB device) from the PC and set it aside. Press Enter one more time and the system should automatically reboot. if it does not or it pops up an error, press the power button to reboot the system manually.
First Boot After Installation
Once rebooted, if prompted select “Unbuntu” and press Enter, otherwise, wait for the startup processes to complete and proceed to login by pressing: Enter -> “yourusername” -> Enter -> “yourpassword” -> Enter Note: when typing your password it is normal that it does not appear on screen. After that, you are done.
Congratulations, you have successfully installed Unbuntu Server!

No responses yet